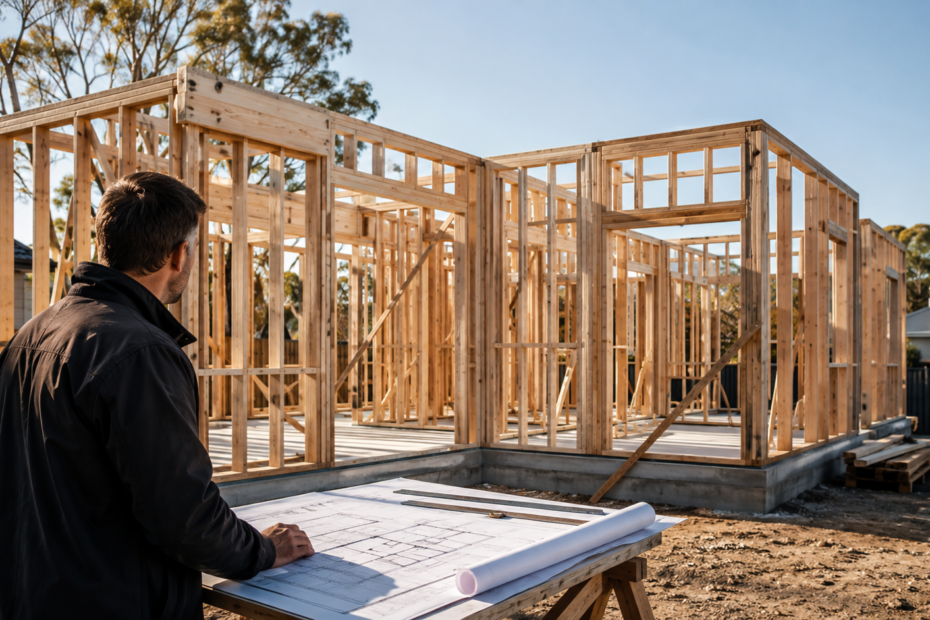
Before the Walls Go Up: Planning Decisions That Shape a
Custom Home
For most people, visualisation of their future home is dominated by
aesthetics — the colour of paint, the type of stone on the bench tops,
the style of the tapware. However, the real decisions that shape the
ambiance of the home are made weeks before these items are selected. And
they are all hidden away in a framing plan that only the builder and
engineer will spend hours discussing. Wall thicknesses, stud sizes,
ceiling heights, and bracing configurations all play a part in
determining whether the home will be comfortable, cosy, and light-filled
long after the final cushion has been placed on the couch.
Decide
on wall depth first — it dictates everything else
The most important decision when choosing the stud size and centres
is deciding on the cavity depth. Studs are commonly 90×35 or 140x45mm,
with centres of either 450 or 600mm. You may think that this decision
has little bearing on anything else, but it is, in fact, your largest
lever for optimising the performance of the walls.
A 90mm stud provides a 90mm cavity for insulation, whereas a 140mm
stud provides nearly double the depth for a much-needed boost to
insulation capacity, especially in cold climates. Increasing the cavity
depth also provides more room for acoustic insulation, which would
otherwise be challenging to fit in a shallow cavity, limiting its
capacity and effectiveness.
While reducing the stud centres from 600 to 450mm provides a stiffer
frame, it also allows more fixing options for tiling and other
heavy-duty linings. It uses more timber, however, and creates additional
thermal bridges that reduce the effectiveness of insulation. The
reduction in stud cavity depth also reduces the amount of cavity
insulation that can be installed. Thermal bridging occurs when timber
framing conducts heat from the inside to the outside faster than
insulation can handle on its own, and it is an important consideration
when comparing timber to steel framing, another popular alternative
building material. Timber bridging is much less prevalent and should
also be considered when choosing between frame materials.
While these considerations will have no bearing on your rendered
plans, they will dictate whether your bedroom next to the street will be
warm in winter.
A
ceiling height is a framing decision, not a finishing one
Higher ceilings create the illusion of a larger home without adding
more square metres. Increasing a ceiling height from 2.4 to 2.7 or 2.7
to 3.0m will create the illusion of a much larger room without spending
a fortune on square metres.
However, increasing the ceiling height also increases the required
bracing capacity for walls, as well as introducing new lintel
requirements for openings. It also uses more timber, so, while it is not
as expensive as it sounds, it will affect the final cost nonetheless. If
choosing to increase the ceiling height in certain rooms only, make sure
to talk to your builder about bracing capacity before committing to a
framing plan. Changing the ceiling height after the fact is much more
involved and may require complete reprofiling of certain areas to
achieve the desired effect. Another consideration when choosing a
ceiling height is the MGP rating of the timber. MGP10, MGP12, and MGP15
are all ratings of the load-bearing capacity of the timber. Higher
ceiling heights and spans generally require higher MGP ratings for
bracing capacity.
Asking your builder about the recommended MGP rating for both
load-bearing and bracing walls is a sensible way to start asking the
right questions about framing.
Bracing walls
dictate the placement of windows
One of the most overlooked details when planning a home is the
presence of bracing or shear walls. They are most often recommended by
engineers when designing the framing plan in accordance with AS1684.
Their primary function is to resist lateral and wind loads exerted on
the structure.
The most important consideration when planning shear walls is that
they cannot be replaced by large expanses of glass, unless specifically
designed to do so. Shear walls are often positioned along longer walls,
and their removal or replacement with glass will compromise the
integrity of the structure. If large windows, or even bi-fold or stacker
doors, are envisioned for a particular part of the house, the framing
plan must be altered to accommodate these changes. This would most often
take the form of removing bracing requirements for a particular wall,
and redistributing them elsewhere in the plan.
Making these decisions on the fly often leads to either compromised
design elements or expensive engineering solutions such as portal
frames. Consulting openly with the designer and engineer about bracing
requirements and possible design alterations is important, and should
ideally occur before framing begins, while plans are still being
discussed.
Large
openings dictate the presence of lintels in the ceiling line
Bi-fold and stacker doors are all the rage these days, and for good
reason — they help achieve that sought-after indoor-outdoor connection.
However, large openings such as these require lintels or boxed headers
above them to carry the load that would have been carried by the removed
portion of the wall.
The larger the opening, the deeper the lintel needs to be. A deep
lintel over a 4m span, for instance, will push the ceiling line down and
back at the point of the opening, creating an uneven ceiling height
inside. This effect can also be seen on the outside if the boxed header
is not built out to meet the ceiling line. Another consideration when
boxing a header is the services that may need to be routed above the
opening. It becomes much harder to route services such as ducting or
electrical cabling around an opening if the ceiling height has already
been dictated.
When choosing the location of large openings, make sure to account
for ceiling heights, especially if the opening is to be boxed. In cases
of large openings, make sure that the lintels ordered are compatible
with the ceiling line and not just the structural requirements of the
building.
Decisions on frame
material and species
Having chosen the dimensions, the decision on frame material is
relatively simple — timber framing is, by far, the preferred choice in
residential construction. There are several reasons why timber-framed
buildings offer superior performance over their steel-framed
counterparts. Timber is much easier to work with, which means faster
installation and fewer errors on site. It also conducts heat much less
readily than steel, helping to retain warmth in the building. Finally,
timber is much less likely to introduce cold-bridging into the
insulation continuum, while still being forgiving enough to allow for
minor on-site inaccuracies while remaining code-compliant.
There are several reasons why timber is a great choice for
residential framing, and the deciding factor may well be the cost.
Timber is, in most cases, cheaper than steel, making it much more
desirable in residential construction. Perhaps its most appealing
quality, however, is the aforementioned reduction in cold bridging. A
well-constructed timber frame will have fewer weak points in the
insulation blanket, allowing for a much warmer and more energy-efficient
building.
Two considerations that most people overlook with Timber Wall
Frames are the species of timber used and the level of preservation.
Both factors are integral to ensuring the longevity of the framing and
should be chosen in accordance with local climate and design
requirements rather than what is available at a local supplier. Choosing
the appropriate level of H1.2, H2, or H3 treatment for framing timbers
is much more important than it may seem at first. The wrong level of
preservation can lead to rot or termite damage long after construction
has been completed and hidden in the confines of a wall cavity.
Species choice is also important, particularly in architectural
timbers such as Western Red Cedar. This type of timber is often used in
exposed rafters, posts, and other features requiring a higher standard
of visual appeal. When ordering structural timber framing, it is
important to discuss both options with a supplier to ensure that the
timber selected will match the design specifications. In most cases, it
will be cheaper to utilise a lower-grade timber for structural
applications, while upgrading to appearance-grade cedar for exposed
features. It is important to budget accordingly, and to separate the two
when ordering to prevent overspending on either.
Creating
service cavities rather than notching stud walls
When planning the internal services of the building, electricians and
plumbers must take special care when running services such as electrical
cabling or gas lines through structural walls. The most convenient way
to do this is to notch or drill directly through a stud, however,
multiple notches compromise the integrity of the frame.
Every 32mm notch or drilled hole reduces the section of the stud by
the same amount, compromising its overall capacity. Multiple notches in
close proximity to each other will turn a code-compliant stud into an
unsafe one.
The best way to deal with services in rooms with a high concentration
of penetrations such as kitchens, bathrooms, or media rooms, is to plan
a service cavity. A cavity can be formed by utilising deeper studs,
double-stud walls with space in between, or batten timbers installed
within the stud cavity that carry the services and are subsequently
hidden from view.
A cavity adds to the overall timber consumption, but reduces the risk
of compromise to the frame, and causes fewer issues on site due to the
services running alongside rather than through the frame.
Soundproofing
decisions are made within the wall, not on it
Soundproofing is one of those jobs that homeowners often believe can
be added on to existing walls with relative ease. In most cases, this is
untrue. Soundwaves travel not only through the wall, but also through
the timber frame itself, utilising it as a flanking path, making
alterations to an enclosed wall ineffective. The most effective way to
soundproof a home is to utilise a deeper cavity with acoustic treatments
such as acoustic batts or resilient mounts, and/or staggered
internal and external stud framing. These treatments would be near
impossible to retrofit onto an existing 90mm cavity wall.
A 140mm cavity wall with acoustic insulation, mounts, and/or
staggered internal framing is a vastly better option to soundproof a
home, especially for families or those building near heavily-trafficked
roads or areas.
Prefabricated
panels and keeping the frame dry before lining
Most people will never consider these two decisions when touring a
show home. The first is choosing between prefab panels and on-site
framing. Prefab wall panels are constructed in a factory under
controlled conditions and are often much flatter than their on-site
equivalents. This reduces the amount of plasterboard filling required,
as well as the overall number of visible seams, creating a neater and
more presentable surface.
The second decision involves leaving the frame to dry before lining
it. Wet timber that is enclosed in plasterboard will warp and twist,
often causing unsightly cracks along the length of a stud wall, which
will be virtually impossible to disguise with spot putty or other
fillers. It is important to leave the frame to dry, especially if wet
weather is anticipated, as this will greatly reduce the likelihood of
such issues. Good builders will always schedule roof and cladding work
in accordance with internal lining schedules to ensure that the frame is
as dry as possible at the time of enclosure.
All of these decisions are hidden from most people, who will
generally only see the results of these processes in the completed
house. They will see cracks along the baseboards, hear their neighbour’s
dog barking at all hours of the day, notice how the walls bow out at an
angle when viewing the house from an outdoor deck, or feel constricted
in a house with low ceilings.
These are the details that most people will overlook, but they can
have a large impact on the final result, and should be considered
seriously before a single sheet of plasterboard is cut.